Showing posts with label Desert. Show all posts

Tuesday, 6 December 2011

Mince Pie Time!


It’s time to eat mince pies. I’m not sure why I’ve waited so long to begin the mince pie making frenzy and I am going to have to eat many, many, many of them to make up for lost time. Oh shame.

So I made 24 mini mince pies last night. There are 4 left, 2 of which I’ve hidden for later. I haven’t eaten them all myself I hasten to add! I had a little help from George, Billy and Flo. Honest. But they are very good.

The main part of the Christmassy goodness of a fabulous mince pie is obviously the mincemeat, the recipe for which you can find in my November recipes. And now that I’ve eaten a fair few of them I do believe that I am qualified to say – it is a great mincemeat recipe. Actually, it’s the best.

Now a little mince pie trick I have found to lure people who have otherwise not been too fussed about them, is to reduce them in size. Simple. If you make mini mince pies, then they become a delectable little mouthful of bursting fruit and nut flavour. People seem more willing to commit to a mini mince pie and then after a little break, guaranteed they’ll be back for more.


Also, less pastry. Replace the pastry topping for a good nutty crumble and fall in love with mince pies all over again!

I do not say this lightly. I promise these are fantastically festive and tasty treats. Easy and fun to make and everybody loves them.

My confession here is that I bought the pastry. Yep, I was pressed for time and French, shop-bought, sweet shortcrust is pretty good. Maybe at the weekend I’ll do it properly and make my own pastry but on a Monday night, really the nights are so short! However as homemade is always best I’ll include the recipe for you.

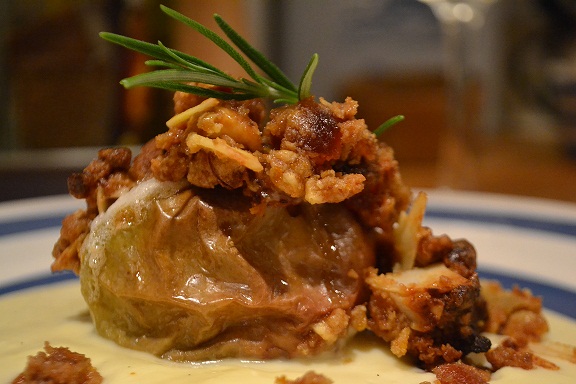
I will make some with filo pastry too. Now those really are a treat, especially warm for desert with vanilla ice cream and a drizzle of hot white chocolate sauce…

So for 24 mini mince pies you will need;

1 large jar of mincemeat

1 pack of ready-rolled sweet shortcrust pastry or;
225g/8oz plain flour
110g/4oz cold butter
80g/3oz sugar
1 egg yolk

For the crumble;
25g/1oz wholemeal flour
25g/1oz porridge oats
25g/1oz shelled walnuts
A good handful of flaked almonds
35g/1 ½ oz butter
½ tsp cinnamon
½ tsp mixed spice

Method;

  • Pre-heat your oven to gas mark 5, 190ºC, 375ºF, 170º fan oven

  • If you are making the pastry yourself then put the flour, butter and sugar into a food processor and pulse until you have a breadcrumb texture. Then put in the egg yolk and pulse again until you have a nice yellow dough. If it is too dry to form a dough then put in some milk a teaspoon at a time until a dough forms. Chill in the fridge wrapped in clingfilm until ready to use.

  • Whilst the pastry is chilling (or before you open the packet), you can make the crumble mixture. It is tempting to make a lot of it, which is no bad thing because any remaining crumble can go in the freezer for the next batch. But you don’t need a huge amount for this recipe so don’t worry about the measurements I’ve given.

  • Put the wholemeal flour, oats, sugar, spices and walnut halves in a food processor. Add the butter, cut into smallish pieces. Then pulse the blender until you have a breadcrumb texture. It will look quite buttery but that’s fine. Then give the flaked almonds a bit of a scrunch and add those too, stirring them into the crumble. If you don’t have a food processor then rub the butter into the flour until it resembles breadcrumbs and stir in all the other ingredients. You will need to chop the walnuts up a bit with a knife and scrunch the almonds up as before. Pop the crumble mixture in the fridge until you’re ready to use it.

  • So roll out the pastry and with a cutter or knife cut out circles to fit the mini patty tin. I got hold of some silicone ones which were dead cheap and work a treat. Line all the holes with the pastry nice and gently making sure you don’t stretch the pastry.


  • Once all the holes have been lined with pastry, use a teaspoon to fill them with the mincemeat. You can be fairly generous here, a nice little mound to make a good mouthful.


  • Top the mincemeat with generous spoonfuls of the crumble mix and then pop into the oven, on the middle shelf for 20 minutes until nice and golden.


  • Leave to cool in their tins until cool enough to handle then transfer to a cooling rack. Once they have cooled you can dust them with icing sugar and start on the mulled wine.


Delicious. The filo versions make a great alternative to the pastry too. I’ll make some this weekend and take some photos for you. They look very pretty as a Christmas canapé or after dinner treat.

I’ve been making pop-corn wreaths for the tree. It’s fun I have to admit though hard not to eat as much as I’m sewing. They get the glitter spray treatment tomorrow and I’m quite excited as to how they’re going to look. Might want to stop eating them at the glitter stage I guess. And it might seem a bit early but I’m putting the crew Christmas tree up this week. I think I could be more excited by it then the guys but that could mean I get to decorate the tree myself. Good news to a Christmas tree perfectionist.

Thanks for reading!

Cheers.


Friday, 9 September 2011

Stuffed, Baked Apples with a Little Difference.


Hands up whose favourite desert when they were a kid was a good old stuffed, baked apple? Anyone?... Those back-to-school days, that glut of apples from the back garden and endless apple puddings.

Stuffed, baked apple was my least favourite. There was nothing ‘fun’ about a stuffed apple as far as I was concerned. It was a desert for old people. No chocolate, no treacle, no cakey bit, no tasty bit you could dig for; just raisins, cinnamon and cheek-pinchingly tart apples from the garden.

And so much of it! Why were they always so big?  Stuffed by a stuffed apple. The cruel fate of a well behaved child. I mean, let’s face it; stuffed apples were just not cool.

Funny how I love them now.

Wissy, George’s Mum, made us one my first night back from France. And I joyfully ate the whole thing. It was the most delicious stuffed apple I’d ever had and made it even more of a joy to be back in the UK at such a time of year. A real inspiration for this recipe.

I’m in Norfolk as I write this blog. George and I are looking for a house to buy round these ‘ere parts. We’re looking for that dream cottage, the one that we live in in my ‘other’ life. If you’ve read my blog, 'My Other life and Baked Bananas', you’ll know exactly what I mean.


We haven’t found it yet on this trip home but I will continue the hunt. When I’m not cooking or writing about cooking I’ll be looking for my home, tucked away in my stuffy cabin on the internet. It’s out there somewhere waiting for me. It has apple trees in the back garden of course and one day I will force feed my children stuffed apples for months on end. Tehe.

Okay, I might have made a more child-friendly stuffed apple recipe up my sleeve. They’re small apples and they have white chocolate in them too. And even if you’re old like me you’ll probably like these too;


For pretty tasty little stuffed apples for 4 you will need;

4 small Braeburn apples or similar
Zest and juice of one lemon
Zest and juice of 1 orange
50g S.R flour (self raising makes a much better crumble for some reason, my Gran swears by it and I have to concur)
50g crushed Amoretti biscuits
2 tbsp dark brown sugar
100g glace cherries, finely chopped
50g cold butter
50g white choc, finely chopped
50g flaked almonds
Few drops of vanilla extract
Heat your oven to fan oven 140, gas mark 4 or as far as it will go boat oven…

Method;

  • Begin by preparing the apples. Take the top slither off the apple and then with a teaspoon dig out the core and a little bit more so that you can get a good bit of the stuffing in. When the apples have been cored, pop into a baking dish and rub the insides of the apple with the lemon juice to stop them from going brown. The lemon juice will add to the final flavour so be generous with it.

  • Put them in the oven for about 15-20 minutes.

  • Next make the ‘crumble’ mixture. Rub the butter into the flour with your fingertips. It will be quite buttery at this stage so best not do it in a food processor in case it turns into a dough. Then mix in the crushed Amoretti biscuits, flaked almonds and orange and lemon zest and a few drops of vanilla extract. When it is all well mixed, gently fold in the white choc and cherries. It will be a nice crumbly, buttery mixture. Don’t eat too much of it at this stage or you wont eat your supper.


  • When the apples have had 15-20 minutes cooking gently in the oven they should be tender but not too soft. Spoon in the crumble mixture packing it in quite well and over-filling them so that the mixture loosely covers the top of the apple. Pop back into the oven and cook for another 10 minutes.


  • I think they would be lovely served with a rosemary and orange syrup and custard. As it was I didn’t really have the time so I garnished them with a sprig of rosemary and served with freshly made vanilla custard with freshly squeezed orange juice in it.


Yum. Seasonal and tasty and gooey and a little bit naughty but healthy too! Practically Angelic then.

So we’re back to France on Saturday…oh that’s tomorrow. I’ve mixed feelings. It’s going to be incredibly busy and a lot of hard work with 3 classic yacht regattas back to back; Monaco, Cannes and St Tropez. Lots of sailing and lots of guests and Birthday wishes for Mariquita who is a hundred years old this year. She is a beautiful boat and we are so lucky to be racing her still.

I’ll let you know how it all goes. And I’ll let you know if I get my dream cottage in the country-side. Why England when I’ve travelled around the Mediterranean and spent time in some great countries you may ask?

I love the country-side here. Nothing beats the green of the English country-side. It’s so lush and so very…home.

For now, I’ll be content with life aboard an old wooden racing boat, the glamour of racing in such prestigious places in the Med. And I love it all. I’m very proud to have been a part of Mariquita’s amazing history.

Thanks for reading
Thats quite a tree trunk.

Cheers!


Typical Norfolk road-side

Who the hell needs stuffed apples when there are cow pats to enjoy?


The beautiful Norfolk woodland

Monday, 27 June 2011

Sweet Sushi Woo


Yesterday was Saturday and I was on watch. There is a watch rota when the boat is either in a non-secure marina or we’re at anchor. And yesterday it was my turn which was fine by me. I had plans. Sweet sushi plans. I’ve never made sweet sushi before and got the idea whilst looking at a French cooking magazine. What I thought was sushi filled with fruit turned out to be some kind of cream cheese filled with fruit but my imagination was already on fire. Why had I never thought of this before?! The possibilities for sweet sushi are endless. I had to limit my ideas down so that I wouldn’t explode with excitement and wreak absolute havoc in the galley all in one go. One step at a time, Suzy. Mind you, the crew thought it was great of course. They don’t always get spoons at dinner time (or in this case; chopsticks)


It was the Nori seaweed I was most unsure about but looking ‘sweet sushi’ up online showed me that you can still use the seaweed to roll. The flavour of the seaweed is fairly inconsequential once the sushi filling is involved and all the other bits and bobs that go with it.

So I boiled my uber list of flavour possibilities down to a manageable, one day experiment and ‘Woo-Hoo’, I was off! I know this looks like a lot of ingredients and work but it’s really all pretty straight forward to make and the pay off is in the eating I can assure you.

My flavour ideas;

Coconut and cardamom infused, sweet sushi rice
Mango and mint sushi
Fruits of the forest sushi
Gooseberry, lime and wasabi puree
Dark Chocolate and red berry dipping sauce
Green tea and ginger spiced poached pears with star anise

Oh yeah.

If you have never made sushi before then this would be a fun way to start I reckon. It isn’t at all tricky; the thing with sushi is that it’s not normally the quickest of meals to prepare. But because this one is a desert and not a main meal, I only needed a small amount. Two rolls of two different flavoured sushi was definitely good for 4-5 people. Sweet sushi could be made in advance and served either that night or at a push, the next day. The great thing about the fruit sushi is that you don’t have the freshness of the raw fish to worry about so you can make it ahead of time and serve when you’re ready. And your hands don’t smell all fishy after you’ve made it. Bonus.


So these were my chosen flavour combinations but you could really go wild with all the potential flavours you could use. Tell you what though; gooseberry, lime and wasabi make the most fantastic puree ever. I had some gooseberries in the freezer and have wanted to use them for something exciting for months now. Gooseberries are so tangy and tart and that lovely bright green that it seemed so obvious to try them with the wasabi, a bit of lime juice and sweetened of course with some vanilla sugar.


It was all pretty simple to make and although it wasn’t the quickest thing to make, now I’ve experimented once, I’ll be even quicker next time.

For Sweet Sushi you will need;

For the rice;
1 cup of sushi rice
1 ¼ cups of coconut milk
8 cardamom pods
4 tbsp of sugar

For the mint and mango sushi;
1 ripe mango
Fresh mint leaves
Cream cheese
100g pistachio nuts, shelled and finely chopped with 2 tbsp of chocolate vermicelli added. 

For the Fruits of the Forest sushi;
1 cup of frozen, mixed red berries. Or a mixture of fresh red currents, black currents, black berries, blueberries etc. Just give them a gentle simmer in a tbsp of juice or water.

Nori seaweed

For the Gooseberry, Lime and Wasabi puree;
1 tsp wasabi paste
1 cup gooseberries, topped and tailed
Juice and zest of ½ lime
3-4 tbsp of vanilla sugar (or use plain sugar and a few drops of vanilla extract)

For the chocolate sauce;
1 250g bar of dark chocolate

For the poached green tea and ginger spiced pears;
4 large pieces of crystallised ginger
2 small firm pears
1 green tea bag
2 cinnamon sticks
4 whole cloves
½ vanilla pod
2 star anise


Method;

  • Definitely start by making the rice. First soak the rice in a plastic or ceramic (not metal) bowl of water for around 20 minutes. Once it has soaked, rinse it well in cold running water (again, using a plastic sieve, not a metal one) until the water runs pretty clear.

  • Put the rice into a saucepan and add the coconut milk. Using a rolling pin or your fist onto the flat of a large blade, gently bash the green cardamom pods so that the seeds inside are exposed. Heat a small saucepan and dry fry the pods for about 40-60 seconds to get their aroma to waken up a bit. Pop those in the coconut milk with a star anise. Stir and cover the pan with a heavy tight fitting lid or some cling film as I do for rice. Don’t worry, it puffs up but it never goes pop, I promise.

  • Bring the rice to the boil then turn the heat down to its lowest heat and leave to cook nice and slowly for 12 minutes. Turn the heat off and leave the rice for another 10 minutes to rest. Do not take the lid or cling film off at this stage. It’s very important to keep all the lovely steam in.

  • When the ten minutes is up, tip the rice into a shallow plastic tray or onto a wooden chopping board and spread it out evenly so that it can cool quickly. Sprinkle liberally with sugar and using a chopping motion as if you’re mixing cement with a trowel, mix the sugar into the rice.

  • Leave the rice to continue cooling and prepare the fruit for the sushi. Put the frozen berries to defrost in a sieve and place over a bowl to catch all the lovely juices. This will go into the chocolate sauce later. Prepare the mango so that you have some long wedges to go into the sushi.  There. That’s that.

  • To make the gooseberry puree, pop the gooseberries into a pan with the zest and juice of ½ lime. Bring to the boil to cook the gooseberries and reduce the liquid. This should take no time at all, about 5 minutes. When they have cooled, add the tsp wasabi paste and the sugar, a pinch of salt and blend till smooth. You can do this in small stages if you’re unsure how strong your wasabi is! But do try to add the full tsp. The flavour is truly amazing. Taste and add more sugar and/or wasabi if you wish. Refrigerate. Deep breaths now if you’re getting too excited.


  •  For the pears; make a nice cup of hot green tea. Pour into a saucepan and add 2 cinnamon sticks, 2 star anise, 4 cloves, 4 finely chopped large pieces of crystallised ginger and the juice of the remaining lime half. Add 2 tbsp of brown sugar and stir. Prepare the pears by peeling, chopping in half lengthways and coring with a tsp. Pop those into the poaching liquid and top up with water if needed so that they are just covered. Bring to the boil and then simmer gently for about 15-20 minutes so that they are soft but not too soft. Decant into a bowl with the liquor and spices, cover and chill.

  • That’s almost all the prep done and now is the exciting moment where you get to roll some sushi!  Have your finely chopped pistachio nuts and vermicelli on a flat plate ready. We’ll do the mango and mint ones first. So, take your rolling mat and cling film it. Spread the rice in a good layer over the Nori as explained on the seaweed packet but making sure you cover the entire piece of Nori. Then flip the rice and Nori over so that the rice is on the cling-filmed rolling mat and the Nori is facing up. An inch up from the bottom edge of the Nori, smear across some cream cheese, some of the gooseberry and wasabi puree then the mint leaves then the mango. Roll the sushi according to the instructions on the Nori packet. I hope my photos help explain things!


  • Gently lift the mango roll onto the pistachio plate and roll the sushi in the pistachio and vermicelli to cover the rice. There we go! One mango and mint sushi roll. Now repeat the process so that you have 2. Put on a plate, cover and chill.

  • Almost done. The fruit of the forest one is easier I guess. Take the cling film off the rolling mat and follow the Nori packet instructions for putting the rice onto the seaweed leaving just under an inch gap at the top. Spoon the fruits onto the rice and roll the sushi. Make 2, put onto a plate and chill. Easy!

  • Now all that’s left is the chocolate sauce. Put the choc into a saucepan or in a bowl over a saucepan of simmering water. Add 3 tbsp hot water to the chocolate and let the chocolate gently melt. Try not to stir it too much at this point, just let it very gently melt (like how I do when I’m cooking in the galley).

  • When the chocolate has melted stir and make sure that it isn’t too thick by adding a little more hot water if needed. Then pour in the red berry juices saved from earlier.
 
  •  When you’re ready to serve, cut the sushi with a very sharp knife. Cut them in half and then cut the halves into three, six pieces per roll.


  • I did two different styles of serving because even at this point I couldn’t make my mind up about what flavours should go where! A little surprise though was how good crystallised ginger dipped in chocolate and berry sauce is…
 Actually all of it was really good dipped in the chocolate sauce. And it all looked so pretty on lovely big white plates. I was so pleased and excited with it all and it tasted so refreshing and so good. And like I said there are so many possibilities for other flavours, you should really have a go at it. Let me know how you get on.

 We’re another week at anchor on Mariquita here in Cogolin. Then off to Barcelona. It will be so nice to be in Spain. A different culture, exciting new food, the nightlife. And being attached to land again will be very welcome.

Thanks for reading about my sweet sushi experiment. The crew were happy guinea pigs! Next time I’ll serve with chilled sweet sake I think…


Cheers! See you next time.                                               

Friday, 17 June 2011

Sweet, Sweet Cherry Clafoutis

It’s getting hot. It’s getting damn hot. The sort of hot that has you scratching the little tickle of sweat, trickling down between your shoulder blades and begging for the smallest of breezes. We don’t have air conditioning on our boat. My galley has a little fan in it placed above the cooker. It wasn’t the best place to put it. When I’m cooking the heat rises (science that) and the fan conveniently proceeds to blow hot air at me. I tend to melt unattractively in a slow but increasing fashion as lunch or dinner approach. When I give the Mariquita ‘Whoop-Whoop’, for meal times, the crew rush down below for food as quickly as I rush up on deck for some cool air. How glamorous I must look as I gasp for air, red faced and flapping my tee-shirt in the vain attempt to cool down; usually between two huge plastic motor yachts draped with beautifully reclining, bikinied, women glowing ever-so-delicately.

I suppose it would be sensible enough to insist upon a cold salad lunch regime but that would be dull and limiting and I can definitely cope with melting before I can cope with serving raw food, bread and cheese for every meal.

And besides, I promised them more baking. Well, actually I didn’t exactly promise. I simply hinted; and to you too. For it is cherry season in France; and I had the desire to make cherry clafoutis for desert (pronounced clafootee). I really can’t remember the last time I made a clafoutis and suspect it was probably when I was at cookery school. Cherry clafoutis is said to hail from the Limousine region in France and, as there is with most dishes of distinction, there’s a bit of foot stamping from other regions who also claim it as their own.

Whatever, it definitely hailed from my galley oven last night. My Force-Ten oven is surprisingly capable of turning out one mean cherry clafoutis. Who knew?

Consisting of cherries laid in a dish and covered in a simple, vanilla-spiked batter, it really is a must-go-for-it desert. There are some variations which involve kirsch, the cherry liquor but I decided to go for the simple recipe and experiment later on. You can pit the cherries if you can be bothered but conveniently enough, if you leave the pips in, the flavour of the cherries is much improved and exudes the hint of almond important to the dish. Just got to warn your guests about them. I read many times that clafoutis should be served straight from the oven with a small dollop of crème fraiche or yoghurt. So I unashamedly served my clafoutis with a delicious tub of vanilla ice cream. Well, why not, the evening was so hot by the time I pulled it out the oven and I think it was the perfect combo. A soft and fluffy batter surrounding the hot little, sweet, tangy bursts of cherry merging with a melting of cold vanilla ice cream… yeah, me too.


If you’re making this for guests then you could do them as individual puddings which would look lovely. Its signature garnish is a good dousing of icing sugar and I reckon the odd little refined curl of lemon zest and a wee sprig of fresh mint would help draw the attention. I made one big one for the crew and this is how I did it;

You will need;

About 300-350g cherries, stalks removed but left with the stones in
300 ml milk
60g castor sugar
3 eggs
60g plain flour
½ tsp baking powder
1 vanilla pod, split lengthways down the middle, the little black seeds removed
Or ½ tsp vanilla extract
A pinch of salt
Icing sugar to serve
and a really good vanilla ice cream or crème fraiche to play by the rules

Method;

  • First heat your oven to about gas mark 4 or 180C (if your oven is like mine then turn it to full blast and hope for the best)

  • Butter a nice serving dish or dishes if you’re doing the individual ones and lay the cherries in a single layer so that there is plenty in there but not too crammed.

  • Beat the eggs and sugar in a bowl with an electric hand whisk until light in colour and smooth, about 3-4 minutes. Then pour in the milk and the vanilla seeds or extract and whizz again just to mix.


  • Sieve into the mixing bowl the flour, baking powder and salt and beat until you have a nice smooth batter. Now pour this over your cherries but so you can still see the cheeky little things just about poking out and pop into the pre-heated oven. See, simple as.


  • Bake for about 30-40 minutes till lightly golden, risen and set. You can leave it to rest a little as the cherries will be pretty hot! Then sprinkle with icing sugar and serve with your chosen dollop of naughty-ness.


I really hope you make this if you haven’t before. It was so quick and easy but very pretty and tastes so good. And I guess you could happily use other seasonal fruits all year round. Actually I’m wondering if a light almond ice cream would have been better…   Mmmm.

Vanilla, Almond, no matter! I’ll just keep thinking about ice cream if that’s Okay by you? I can’t possibly eat too much of it but I can definitely keep dreaming about it in this heat. But like I’ve said before, if you can’t stand the heat, get out of the galley. Does sticking you’re head in the freezer count as getting out of the galley?  Nah!

Salad for lunch tomorrow then…
Just kidding.

Thanks for reading and if I haven’t completely melted by then, see you soon.
Cheers!

'Glowing' in a hot galley