Sunday, 18 December 2011

From Old Rope To Bread Sauce


I’m sure that being December, almost Christmas and ‘tis the season to be busy, you wont have noticed I haven’t blogged much this month. Actually, only once (Oops). I apologise if I’ve let anybody down. Or rather I suspect that this is the part where teacher looks condescendingly down her nose to announce, ‘you have only let yourself down’.

(Mind you I did just spell ‘condescendingly’ correctly first time round without angry red, zig-zaggy underline from Microsoft Word, thus inflating sense of self-worth. And twice at that! Ah, such pride.)

However this time of year on Mariquita is, without sounding ungrateful, a reasonably dull part of her year. In truth it is a duller but better time of year for me in equal measures. We’re not racing in any adrenaline fuelled regattas, winning trophies and exploring the food markets of the Mediterranean (awesome), we’re sanding, varnishing, taping up, removing tape, sanding, varnishing, taping up (you get the drift) on a cold, stationary boat in the same marina for 6 months. It is a time of year that does not make for pretty pictures of our normally exquisite Mariquita. Her ropes and lines are hanging up in a dusty container along with exciting stories worth blogging about.


However, as I may have mentioned in a few earlier blogs; we have weekends off. I sleep in a double bed. And I have some time for ‘My life’. Living in very close quarters on a busy racing classic boat with 6 other people, one ‘heads’ (shower room) and limited water rations tends to render such things as distant memories. Time to indulge in ‘me’ is a 6 month treat I don’t take lightly as I go into my 4th year aboard Mariquita.

And I refuse to blog about nonsense simply to keep my ‘numbers’ up. If I blog I want it to be a story or recipe worth telling.

This recipe is worth telling. This recipe means Christmas to me and I think that if I were to endure a Christmas without eating any, I would cry like a child with no presents under the tree. A proper chin wobble.

I have had actual arguments with at least two people, Bridget and Will Jones, about who loves Bread Sauce the most. Of course I always win hands down. I love bread sauce more than anybody in the world. There, it’s in writing now.


Bread Sauce is not just for Christmas, it’s for life. Really good bangers and mash are upgraded to first class with the addition of some bread sauce at any time of year. But cold, left-over bread sauce scooped out of the bowl with a left-over chipolata on Boxing Day rocks my world. It is a recipe of medieval origins that has stood the test of a time as a way of using up left-over bread and as an accompaniment to domestic fowl; turkey of course but also chicken, pheasant and goose but also as I mentioned before, sausages go beautifully dunked in the white spiced stuff hot or cold.

I guess it’s the addition of infused cloves and onion that make bread sauce particularly festive and I am counting the days before George and I fly home to the UK for Christmas with family and friends. A holiday! Time away from the boat and a great excuse to consume lots of delicious food and pints of bread sauce.

I frequently come across people who have never tried the very British bread sauce before so for you guys here is a solid recipe from none other than good old Delia Smith. Apart from never weighing my ingredients, I have always followed this method of making bread sauce. It works and it is delicious.

This could change your life, certainly your Christmas experience so prepare to be swooned by an ancient, simple sauce and then we can all fight over who loves it the most. What a fun fight that would be!

For a saucepan full of hot bread sauce to serve (me) 6 people you will need;

110g, 4oz freshly made breadcrumbs. A liquidiser/food processor does the best job of this. Stale bread was used because it was easier to grate that way and does make a delicious sauce but do use fresh in a blender if you can.
1 large onion
15-18 whole cloves
1 fresh bay leaf
8 black peppercorns
1 pint, 570 ml milk
50g, 2oz butter
2tbsp double cream (loosely)

Method;

  • Cut the onion in half, peel and stud both halves with the cloves. Put the milk into a non-stick saucepan with the clove-studded onion halves, the bay leaf and the peppercorns. Season with a pinch of salt.


  • Bring the milk slowly to boiling point then take off the heat, cover and leave in a warm place to infuse for at least 2 hours (a day is better!). This could be the back of the Aga/Rayburn or hob.

  • When you’re reafy to make the sauce, remove the onion, peppercorns and bay leaf from the milk and put to one side, don’t discard. Stir the breadcrumbs into the milk and add half the butter. Leave on a very low heat stirring now and then till the bread has thickened the sauce – about 15 minutes.

  • Put the onion and bay leaf back into the sauce and leave in a warm place until you are ready to serve. Then simply remove the onion and bay leaf and reheat the bread sauce gently, adding the other half of the butter and the cream. Season to taste with salt and freshly ground black pepper.


My mum would double the amounts Delia gives because my sisters and I would greedily pour unlimited amounts onto our turkey at Christmas. Also brown bread works just as well and you can use semi-skimmed or skimmed milk and omit the cream if you want to be a bit healthier about it but hey, it is Christmas.

I really hope you are all having a great Christmas so far, I hear there has been snow in the UK already and it has definitely got a lot colder here in France. Which is good, I like that. Means there is snow in the Alps for snowboarding!! Yeah!!

Thanks for reading, Merry Christmas everybody and

Cheers!

See, look dull.

A bit more shiny but still pretty dull


Tuesday, 6 December 2011

Mince Pie Time!


It’s time to eat mince pies. I’m not sure why I’ve waited so long to begin the mince pie making frenzy and I am going to have to eat many, many, many of them to make up for lost time. Oh shame.

So I made 24 mini mince pies last night. There are 4 left, 2 of which I’ve hidden for later. I haven’t eaten them all myself I hasten to add! I had a little help from George, Billy and Flo. Honest. But they are very good.

The main part of the Christmassy goodness of a fabulous mince pie is obviously the mincemeat, the recipe for which you can find in my November recipes. And now that I’ve eaten a fair few of them I do believe that I am qualified to say – it is a great mincemeat recipe. Actually, it’s the best.

Now a little mince pie trick I have found to lure people who have otherwise not been too fussed about them, is to reduce them in size. Simple. If you make mini mince pies, then they become a delectable little mouthful of bursting fruit and nut flavour. People seem more willing to commit to a mini mince pie and then after a little break, guaranteed they’ll be back for more.


Also, less pastry. Replace the pastry topping for a good nutty crumble and fall in love with mince pies all over again!

I do not say this lightly. I promise these are fantastically festive and tasty treats. Easy and fun to make and everybody loves them.

My confession here is that I bought the pastry. Yep, I was pressed for time and French, shop-bought, sweet shortcrust is pretty good. Maybe at the weekend I’ll do it properly and make my own pastry but on a Monday night, really the nights are so short! However as homemade is always best I’ll include the recipe for you.

I will make some with filo pastry too. Now those really are a treat, especially warm for desert with vanilla ice cream and a drizzle of hot white chocolate sauce…

So for 24 mini mince pies you will need;

1 large jar of mincemeat

1 pack of ready-rolled sweet shortcrust pastry or;
225g/8oz plain flour
110g/4oz cold butter
80g/3oz sugar
1 egg yolk

For the crumble;
25g/1oz wholemeal flour
25g/1oz porridge oats
25g/1oz shelled walnuts
A good handful of flaked almonds
35g/1 ½ oz butter
½ tsp cinnamon
½ tsp mixed spice

Method;

  • Pre-heat your oven to gas mark 5, 190ºC, 375ºF, 170º fan oven

  • If you are making the pastry yourself then put the flour, butter and sugar into a food processor and pulse until you have a breadcrumb texture. Then put in the egg yolk and pulse again until you have a nice yellow dough. If it is too dry to form a dough then put in some milk a teaspoon at a time until a dough forms. Chill in the fridge wrapped in clingfilm until ready to use.

  • Whilst the pastry is chilling (or before you open the packet), you can make the crumble mixture. It is tempting to make a lot of it, which is no bad thing because any remaining crumble can go in the freezer for the next batch. But you don’t need a huge amount for this recipe so don’t worry about the measurements I’ve given.

  • Put the wholemeal flour, oats, sugar, spices and walnut halves in a food processor. Add the butter, cut into smallish pieces. Then pulse the blender until you have a breadcrumb texture. It will look quite buttery but that’s fine. Then give the flaked almonds a bit of a scrunch and add those too, stirring them into the crumble. If you don’t have a food processor then rub the butter into the flour until it resembles breadcrumbs and stir in all the other ingredients. You will need to chop the walnuts up a bit with a knife and scrunch the almonds up as before. Pop the crumble mixture in the fridge until you’re ready to use it.

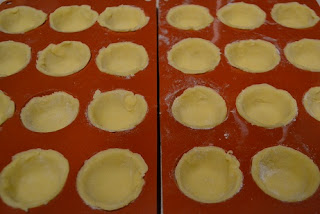
  • So roll out the pastry and with a cutter or knife cut out circles to fit the mini patty tin. I got hold of some silicone ones which were dead cheap and work a treat. Line all the holes with the pastry nice and gently making sure you don’t stretch the pastry.


  • Once all the holes have been lined with pastry, use a teaspoon to fill them with the mincemeat. You can be fairly generous here, a nice little mound to make a good mouthful.


  • Top the mincemeat with generous spoonfuls of the crumble mix and then pop into the oven, on the middle shelf for 20 minutes until nice and golden.


  • Leave to cool in their tins until cool enough to handle then transfer to a cooling rack. Once they have cooled you can dust them with icing sugar and start on the mulled wine.


Delicious. The filo versions make a great alternative to the pastry too. I’ll make some this weekend and take some photos for you. They look very pretty as a Christmas canapé or after dinner treat.

I’ve been making pop-corn wreaths for the tree. It’s fun I have to admit though hard not to eat as much as I’m sewing. They get the glitter spray treatment tomorrow and I’m quite excited as to how they’re going to look. Might want to stop eating them at the glitter stage I guess. And it might seem a bit early but I’m putting the crew Christmas tree up this week. I think I could be more excited by it then the guys but that could mean I get to decorate the tree myself. Good news to a Christmas tree perfectionist.

Thanks for reading!

Cheers.


Sunday, 27 November 2011

Our Daily Bread


The humble loaf indeed. I've been told and have read frequently about how bad for you the modern loaf is. Obviously we're talking here about your average supermarket white bread in all its shapes and forms. In France we consume the very addictive and delicious French baguette and there is nothing like it. It's all so easy to buy, bread is cheap and tastes great toasted and teamed with ones favourite jam or melted cheese smeared all over, possibly sliding off one little crusty edge with some excess of oozing melted butter...

Modern wheat has very little in common with the wheat of even a hundred years ago. We have manipulated it so that it makes bread more light and fluffy. It is stripped of its fibre and most of its nutrients. White bread sends our blood sugar soaring because the missing fibre is not there to regulate its uptake into our systems and surprise-surprise we become somewhat addicted to it.

Oh, but it is so delicious! And I'm not writing this to preach or put you off, I can’t imagine you haven't heard any of this before. But I was feeling its effects and not in a good way. I love bread, I love toast and I needed an alternative to the yeasty, white soft doughy-ness that I probably consume in larger quantities then is good for me. After 8 regattas worth of baguette sandwiches this year, my waistline and my health is having a little suffer.

And hoorah! I have found the king of breads. It’s my version of an Irish soda loaf. It is yeast free and made with Spelt flour with a small amount of wholemeal flour to lighten it up a little. I adore Irish soda bread. It’s quicker to make then a cake. It’s certainly healthier than a cake and it tastes absolutely brilliant warmed or toasted with cheese, jam or simply melted butter. And it makes the best bacon butty you will ever have in your life. No empty nutrients or empty promises there at all.


Spelt has more in common with the wheat of old. It is a cereal grain of the wheat family but the large numbers of folk with wheat intolerances usually fair a whole lot better with spelt. Because of its gluten content it can easily be substituted in baking and breads and imparts a moreish sweetness and nuttiness. It is a loaf so full of flavour and goodness it has changed my entire attitude to eating and making bread.

And here it is. Start living the good life and push aside the humble loaf for bread with attitude; the king of breads. Bread for forever;

For one large loaf you will need;

400g wholemeal spelt flour
50g plain wholemeal wheat flour
50g porridge oats
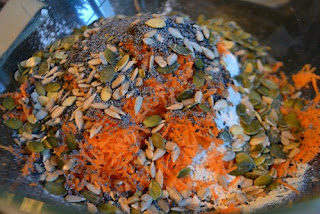
150g mixed seeds (I use sunflower, pumpkin, sesame an poppy seeds)
2 carrots peeled and finely grated
1 tsp salt
2 tsp bicarbonate of soda
2 tsp baking powder
3 pots of natural, unsweetened yoghurt or 450 ml

Method;

  • Heat the oven to gas mark 6, 200ºc. Grease and flour a good quality baking sheet with sunflower oil and plain flour.

  • In a large bowl sift in the flours and baking powder. This helps to aerate the flour which in turn lightens the bread.  Add the bicarb of soda, salt, seeds and porridge oats.

  • Grate in the carrots and then add the yoghurt. Now with a table knife use a cutting motion to mix the ingredients to a point where a dough starts to form and you can get your hands in to give it a quick and gentle knead into a nice round shape. Spelt doesn’t need long kneading to release the gluten so don’t over-knead it or your bread will be too crumbly.


  • On a floured surface shape into a flattened round shape and cut the traditional Irish soda bread cross into the top.

  • Pop into your hot oven for 30-35 minutes till nicely browned. Leave to cool on a cooling rack but before it is cooled, slice off a little bit and smear with butter and honey and pop into your mouth. That’s living.


Because it is preservative free it is best to slice this bread and put into a freezer bag and into the freezer so that it keeps. All you have to do is take out slices when needed to toast or heat in the oven. And this way you can do large batches as it freezes very well.

I implore you to make this bread and learn to love real bread again. It is filling and tastes fabulous and now my only dilemma with it is whether I can make enough for an entire regatta crew for an entire regatta…?  At least I have at least 4 months to figure that one out!

Thanks for reading,

Cheers!
P.S If you'd like this bread to be completely wheat free then simply use all spelt flour or substitute the whole meal flour with extra porridge oats. 


Saturday, 26 November 2011

Season Of Mists


'Season of mists and mellow fruitfulness!
Close bosom-friend of the maturing sun;
Conspiring with him how to load and bless
With fruit the vines that round the thatch eaves run;
To bend with apples the mossed cottage-trees,
And fill all fruit with ripeness to the core...'


Thursday, 17 November 2011

Thai style Mackerel & Vegetable Spaghetti


I’m trying to multi-task. Sadly I’m not very good at multi-tasking despite being supposedly of the right gender in which to do so. I apologise to my fellow females for letting the side down.

I am attempting to write this blog and clean my wardrobe up so that stuff is either lying neatly on a shelf or hanging in a vertical fashion. Less of the crumpled, stuffed-in glob of clothes and more of a neat, well looked after array of lovely things. At this very moment it’s a bit of both.

Living in the crew house during the winter season is wonderful because I can have my very own wardrobe full of clothes. Unlike living on the boat in the summer season where I have 2 drawers and share a wardrobe the size of a shoe box. However it does mean that the potential for clothes explosions are vastly limited.

So dinner tonight needed to be simple or I really was going to be struggling with the whole multi-tasking shenanigans. A meal not just quick and easy to make but a meal of tasteful simplicity; an uncomplicated honesty of ingredients to un-clutter my brain.

Mackerel it was. A fish that needs very little doing to it if you have a lot on. I teamed the mackerel with a gentle, Thai flavoured coconut sauce and some steamed vegetable spaghetti (which I make with a clever little tool). The mackerel was infused with fresh coriander, slices of lemon; some cumin and fresh ginger before being stuffed in the oven which took literally seconds but tasted heavenly.


It did look good, it certainly tasted fantastic and I felt healthy and serene whilst eating it.

Back to the wardrobe.

So for a tasty meal of simplicity and calm whilst all else is in a crumpled heap you will need;

One Mackerel per person, gutted and cleaned
1 lemon
2 inch knob of ginger
1 bunch of fresh coriander
1 tsp ground coriander
1 tin of coconut milk
1 fresh red chilli
2 cloves of garlic
1 tsp ready cut lemon grass from a jar
3 kaffir lime leaves
½ tsp turmeric
3 courgettes or carrots or both
1 red pepper

Method;

  • First make the coconut sauce so that all the flavours can be mingling and mulching together as you get on with the rest of it. Peel (with a teaspoon) the ginger and grate or finely chop, set half aside for the mackerel. Finely chop the fresh chilli, and the fresh coriander stalks, setting the leaves aside for later. Crush the garlic and slice the kaffir lime leaves into very thin strips.

  • In a frying pan, heat a little sunflower oil. Add the garlic, ginger, coriander stalks, chilli, lemon grass and the turmeric and let it all come to a little sizzle. Let it sizzle for a minute or two and then add the coconut milk. Add the kaffir lime leaves and a good pinch of salt. Bring to a gentle boil and then turn the heat right down to low and leave to simmer very gently. Remember tranquil.

  • With a sharp knife score the mackerel three or four times on both sides, fairly deeply. Rub the saved fresh ginger into the slashes and also into the cavity of the fish. Stuff the fresh coriander leaves into the cavity of the mackerel and then season the fish with the ground cumin and some salt rubbing it all over and into the mackerel well. Add some slices of lemon into the mackerel and drizzle with a little olive oil.  Then pop into your hot oven.

  • If you haven’t got a vegetable spaghetti tool then you can slice the courgettes finely and all will be just as tasty. Courgettes and carrots are great vege’s to make into spaghetti though and they steam quickly and easily and make a great substitute for pasta or noodles if you’re feeling… light.

  • As your vegetables are steaming and the mackerel has had 15 minutes in the oven, turn on the grill and grill the mackerel till they are a crispy golden brown.  The fish and vege’s will be ready at the same time as the vege’s literally need only a few minutes to steam.

  • Stir some fresh lemon juice into the coconut sauce and flood your serving plates with it. Arrange a pretty little pile of the steamed spaghetti vege’s and lay the mackerel beside. A very little drizzle of sesame oil and soy sauce and serve.


All this serenity is good for varnishing, the main focus of the jobs onboard this week. The sunshine we’ve been having is well timed and the boom, gaff and spinnaker pole have all had a good coat of Epiphanes. They look so good with their new coat of varnish on, which sort of makes up for the work involved in having to sand them. Just.

Hope you’re enjoying some cheery winter sunshine too?!

Thanks for reading

Cheers!


Saturday, 12 November 2011

Field Mushroom and sliced potato bake (with lots of Garlic)


As the sun innocently rose yesterday morning into the early pale liquid blue of the Provence sky, you wouldn’t have suspected a thing had happened. No apologies, no explanation for the past week’s behaviour, not a puff of wind or a drop of rain; absolute still and early winter serenity.

But we know better, so it can wipe that smirk off its face. I mentioned in my last blog that the flood gates in La Mole had been opened after a week of continuous rain which had us scurrying up the hill for dry land. The next day we bravely (stupidly) made our way back down the hill to the boat for work, via many a detour and around various closed roads. What had previously been vineyards and small burbling streams were now large lakes and gushing rivers. I’m not sure how exactly but a smattering of perfectly spoken Franglaise and we were past the Gendarmes and army barricades and successfully found ourselves back down at the boat.


Photos don't come with noise but the wind screamed through the masts

Not for long however, news came through that the flood levels were still rising as they continued to release water from the reservoirs in La Mole.  Ooops-a-daisy.

So back into George’s Landrover we hopped in the hope of heading back up the hill. Now if you’re in a Landrover, you feel incredibly safe, a bit smug and high off the ground, adequately equipped to cope with a little bit of flood water. Surely the French police would wave us through the barricades with a knowing nod and little French grunt of four-wheel-drive approval?

To cut a long story short, they did no such thing and it took us 4 hours to get home.

4 hours. It normally takes us half an hour.

But what an adventure it was! I shall resist the temptation to bore you with details but I will say that we ended up taking the ‘off-road’ route to get home to avoid hours of motorways – of course we did; we were in a Landy.


Our way home was scuppered at every turn. There were flooded roads we couldn’t cross even in the Landy. There were copious waterfalls as water dropped in torrents from the hill tops and sections of road had simply been washed away but most importantly - there were mushrooms.

We couldn’t help ourselves even in the pouring rain. We were under some kind of forest spell, like children in a sweet shop. So despite the rain and the length of our journey home, we went mushrooming. They were everywhere.


Field mushrooms are easy picking. They don’t hide, stick out like sore thumbs and they taste great. We have a lovely lady who lives in our village who is a mushroom expert. We made a quick stop at hers (when we finally arrived in La Garde Freinet) so she could examine our pickings to be on the safe side, always the way forward with fungi. After a cheerful nod of approval and a farewell gesture of ‘bon appetite!’, dinner was almost home. Thank God; we were starving.

I hope the photos at the bottom of the blog tell the story. In the mean time here is the recipe for a baked dish of Field mushroom and sliced potatoes. A most delicious and satisfying way to serve a harvest of damp, large field mushrooms.


To serve 5-6 people you will need;

A good harvest of field mushrooms or selection of woodland mushrooms thickly sliced.
6 medium to large potatoes, washed but not peeled
2 medium brown onions, thinly sliced
4 cloves of garlic, crushed
Large bunch of flat leaf parsley, leaves and tender stalks (not woody) finely chopped.
A good vegetable stock cube.

Method;

  • Heat the oven to gas mark 6, 200ºC, 400ºF.  In a frying pan gently sauté the sliced onions in a little olive or sunflower oil until soft and starting to colour, about 8-10 minutes. When they have softened add half a tsp of sugar and season with some salt. Let them cook for a few more minutes then pour into the bottom of a large baking dish.

  • Meanwhile, slice the potatoes, not too thin and put in a large pan. Cover with water and crumble in the stock cube. Bring to the boil and let the potatoes cook for about 5 minutes until starting to soften. When they are par-boiled, drain saving the cooking water, the stock from the pan. Now you can begin to layer the potatoes and mushrooms over the onions.

  • Begin with a layer of potatoes over the onions, be careful as they will still be quite hot. Roughly layer the potatoes then cover with a good layer of the sliced mushrooms. They will reduce in size dramatically when cooked so really stuff them in. Then sprinkle over the mushrooms a good splodge of the chopped garlic and parsley stalks and leaves. Season. Then continue layering like this until you have reached the top of the dish lightly seasoning between each layer.


  • Pour over 1-2 ladlefuls of the potato stock (the mushrooms will release a lot of water), dot the top with little knobs of butter and give a little drizzle of olive oil. A good grinding of black pepper and then cover with a lid or some tin foil and pop into the hot oven. Turn the immediately down to gas mark 3, 150ºC, 325ºF.

  • After an hour or so remove from the oven and remove the lid or tin foil and put back into the oven to brown the top a little. About 20 minutes.

And that should do it. Serve with lots of brown, warm crusty bread to mop up all the delicious mushroomy, garlicky juices and a large glass of good red wine. You probably deserve it if you’ve been out mushroom picking.

I’ll leave you there with a load of photos of the adventure. It seems like it was a million years ago now as I sit here admiring the valley bathed in sunshine, the birds singing and the trees standing as they should – upright. I wonder how long it will last.

Thanks for reading.
Cheers!

Our 'short cut' didn't quite turn out as we'd hoped


Flo took it upon himself to test the depth..

Much to the amusment of the rest of us
We'd already decided that it was too deep to drive the Landy across...